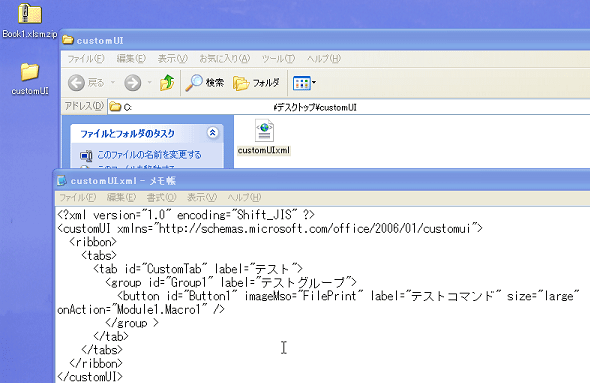
デスクトップに「customUI」というフォルダを作成します。
そのフォルダの中に、以下の様にメモ帳に記述し、「customUI.xml」というファイル名で保存します。
<?xml version="1.0" encoding="Shift_JIS" ?>
<customUI xmlns="http://schemas.microsoft.com/office/2006/01/customui">
<ribbon>
<tabs>
<tab id="CustomTab" label="テスト">
<group id="Group1"
label="テストグループ">
<button
id="Button1" imageMso="FilePrint" label="テストコマンド" size="large"
onAction="Module1.Macro1" />
</group >
</tab>
</tabs>
</ribbon>
</customUI>
「customUI」というフォルダを「Book1.xlsm.zip」内にドラッグします。
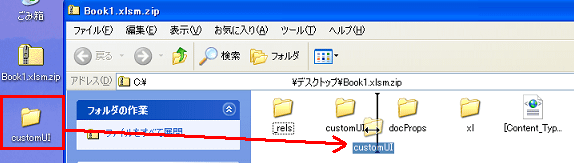
「Book1.xlsm.zip」のファイル名を元の「Book1.xlsm」に変更します。
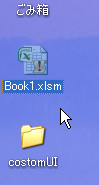
「Book1.xlsm」を開きます。
「テスト」というタブが追加されているのがわかります。
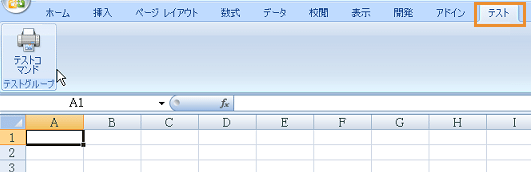
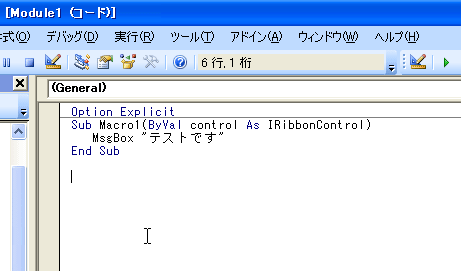
次に開発→Visual Basic Editorを開き、Module1を追加し、以下の様に記述します。
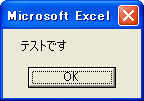
Sub Macro1(ByVal control As IRibbonControl)
MsgBox "テストです"
End Sub
Excelの画面に戻り、「テスト」というタブの「テストコマンド」を実行します。
ダイアログが表示されます。